27 de septiembre de 2012

Pintando paredes DIY


El título parece sencillo, algo de toda la vida. Como mucho en los últimos tiempos nos hemos atrevido con los colorinchis. Pero eso no es todo...¡hay mucho más! Os propongo técnicas e ideas para pintar vuestras paredes de una manera personalizada y original.
¡Quién no tuviera "gotelé"!
Between crushes, fascinations and lust-have trends, our sea of inspiration is never-ending, which brings me to my latest obsession… the color MINT!  From my manicures to my midnight snacks, I just cant get enough.  I took a cue from my go-to hue and decided to inject a happy medium (literally) into my home. A new coat of paint can transform a room and your mood, but choosing the right color can be a little nerve-racking. I dove into this DIY with my head and paint brush held high knowing that Valspar’s Love Your Color Guarantee would be my safety net.  Make your home stylish from the floor to ceiling with a freshly painted feeling! 

To create:  Chose three paint colors in a light, medium, and darker shade that hail from the same color family.  I chose Valspar’s Ultra Green (light), Beach Blanket (medium), and Sea Treasure (dark).   

STEP 1: Trim wall with painter’s tape and use a roller to paint entire wall the lightest hue. STEP 2: Paint a bottom panel with the darkest hue. STEP 3: Mix your medium and dark shade together to create the 2nd darkest color and paint a section. Next, move up on the wall and paint the 3rd section the middle color only. STEP 4: Blend the colors together using a smaller paint brush that is DRY, until areas and lines bleed together. You may need to touch up with mixed paint as you go, as it takes on an amazing ombré effect.


P.S.- A few of Erica’s favorite things:  Melissa di Menna Print, Jonathan Adler Tray,  CB2 Console Table, Satya Twena Hats,  Moroccan Rug, from my travels!
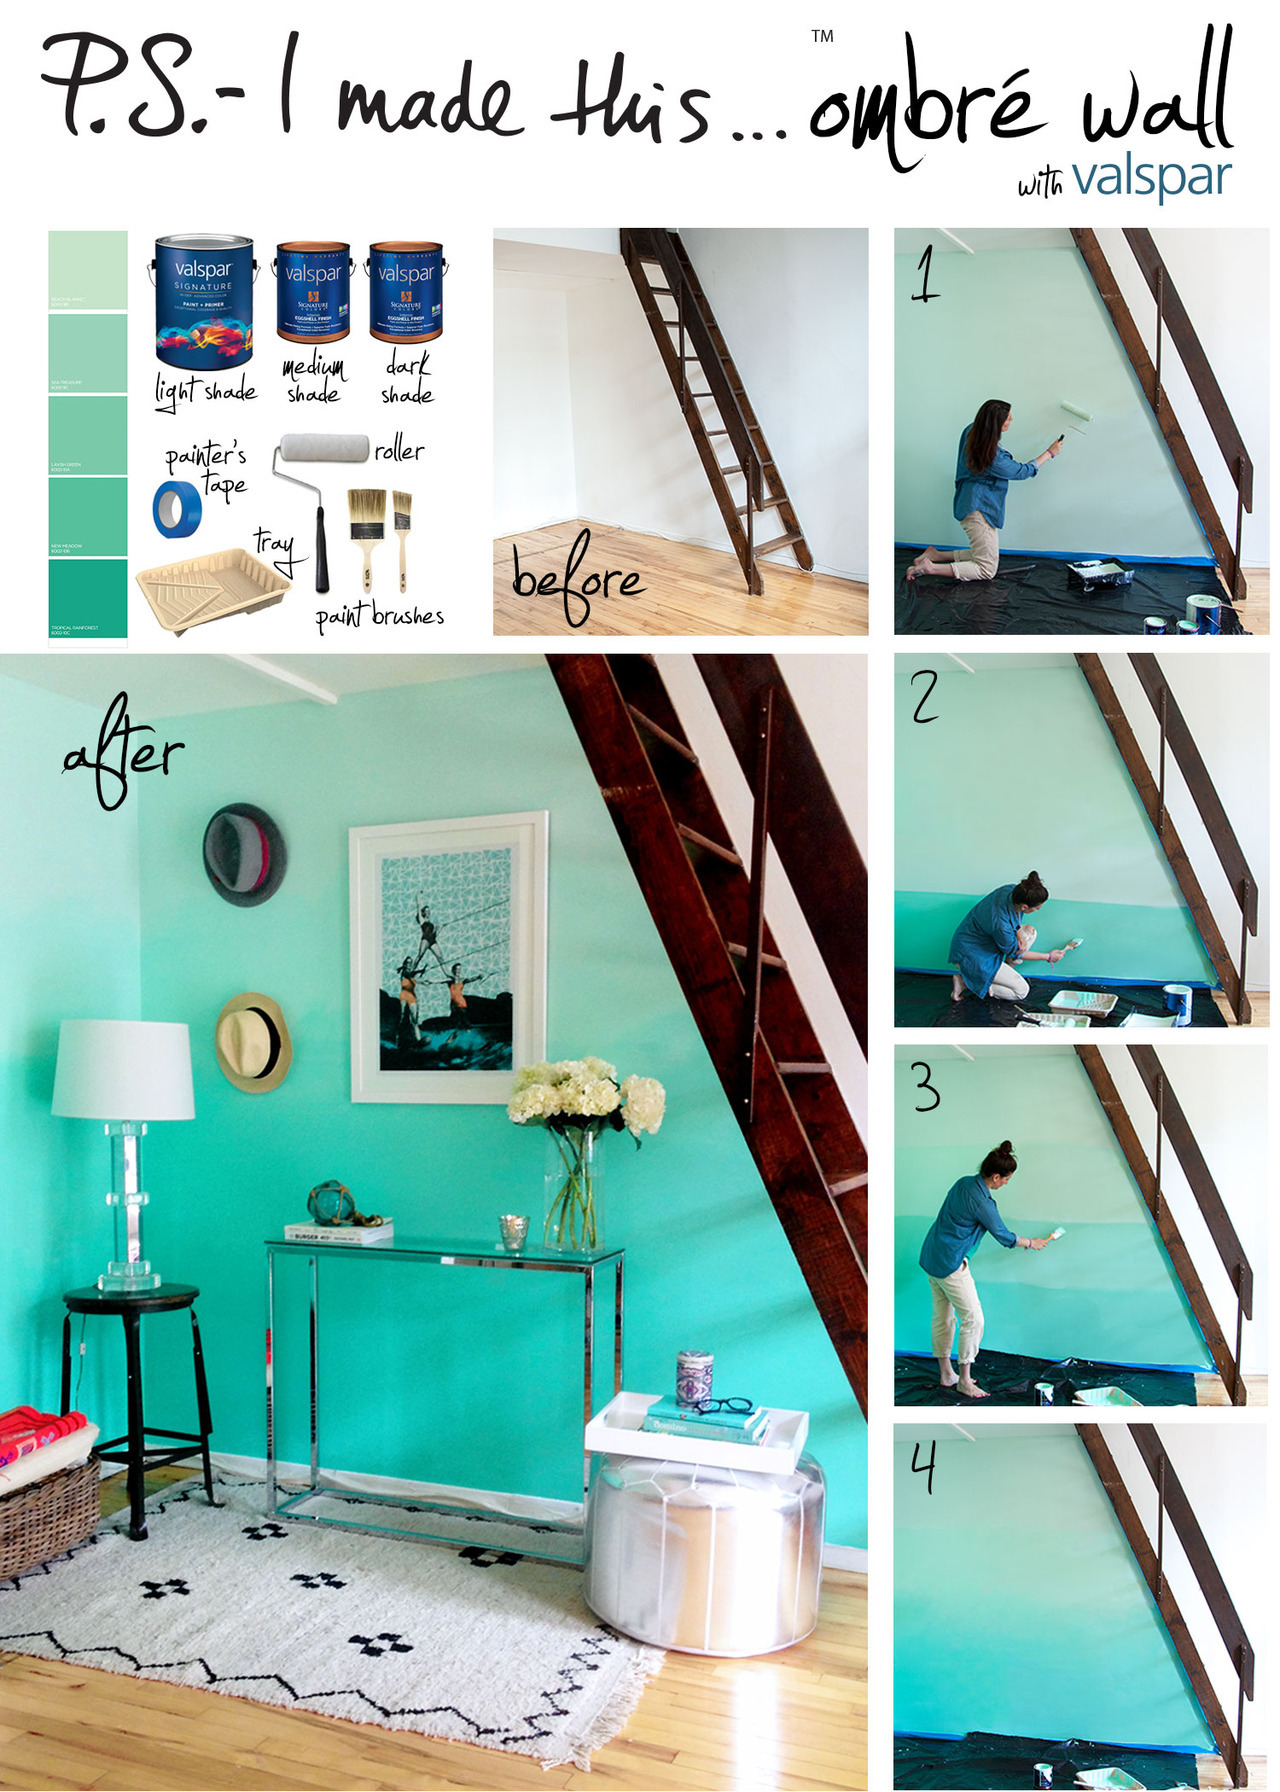
El efecto degradado..¡una pasada!
Podéis encontrar más opciones en este post de Design Sponge pero a mi el que más me ha gustado es éste.

No es papel pintado. Su creadora os enseña todo el proceso desde el diseño por ordenador... Un trabajón.
 
Pon lunares en tu pared con una sencilla plantilla.

Rombos...Sólo con cinta.

Cubos. Todos los pasos de nuevo en:

No hay comentarios:

Publicar un comentario